
在 macOS 的 AppKit 框架中,NSView 使用的是一种独特但非常重要的坐标系统:
1、原点位置:(0, 0) 在视图的左下角。
2、x 坐标:从左向右增加。
3、y 坐标:从下向上增加。
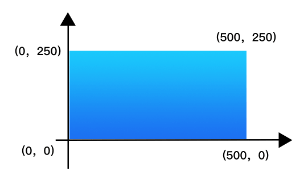
可视化图示
假设 NSView 大小是 width = 500,height = 250
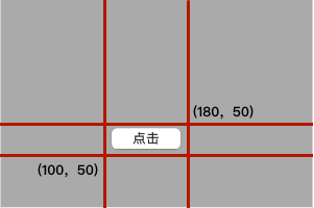
控件布局实例
let view = NSView(frame: NSRect(x: 0, y: 0, width: 300, height: 200))
view.wantsLayer = true
view.layer?.backgroundColor = NSColor.lightGray.cgColor
let button = NSButton(title: "点击", target: nil, action: nil)
button.frame = NSRect(x: 100, y: 50, width: 80, height: 30)
view.addSubview(button)
这段代码表示:在 view 中,从左下角出发,向右 100 像素,向上 50 像素放置按钮。
SwiftUI和NSView坐标系区别
在 SwiftUI 中,默认坐标系统的原点在左上角,这与 AppKit (macOS 的 NSView) 是相反的。
1、AppKit (NSView):左下角 (0, 0),向上走。
2、SwiftUI:左上角 (0, 0),向下走。
SwiftUI坐标示例
struct MyView: View {
    var body: some View {
        ZStack(alignment: .topLeading) {
            Rectangle()
                .fill(Color.gray)
                .frame(width: 300, height: 300)

            Text("左上角")
                .padding(5)
                .background(Color.yellow)
                .position(x: 50, y: 50) // 位置从左上角算下 50,右 50
        }
    }
}
这段代码中,position(x: 50, y: 50) 是从左上角向右 50,下 50 放置文本。
SwiftUI 默认以左上角为 (0, 0),所有布局(如 .position()、.offset())都基于此。
总结
NSView原点在左下角,SwiftUI原点在左上角。