
NSWorkspace 是 macOS 系统中的一个 AppKit 类,中文名称为 macOS 工作空间管理器。
它负责管理和协调:
1、文件、应用的打开。
2、获取正在运行的 App。
3、与 Finder 交互。
4、执行 App 的生命周期事件(如启动、退出)。
常用功能
一、应用管理
1、获取当前前台 App:NSWorkspace.shared.frontmostApplication,当前用户操作的 App。
import AppKit

if let app = NSWorkspace.shared.frontmostApplication {
    print("前台 App:\(app.localizedName ?? "未知")")    // 前台 App:Google Chrome
    print("bundleIdentifier: \(app.bundleIdentifier ?? "无")")   // bundleIdentifier: com.google.Chrome
}
2、获取所有运行 App:NSWorkspace.shared.runningApplications,类似“活动监视器”的列表。
import AppKit

let runningApps = NSWorkspace.shared.runningApplications
for app in runningApps {
    print("运行中 App:\(app.localizedName ?? "未知")")   // 运行中 App:轻压图片
}
类似“活动监视器”的数据。
可结合 .isActive、.isHidden、.bundleIdentifier 等属性进行筛选。
3、监听 App 生命周期事件:NSWorkspace.shared.notificationCenter,启动、终止、激活、隐藏、前后台切换等通知。
import Cocoa

class AppObserver {
    init() {
        let center = NSWorkspace.shared.notificationCenter
        center.addObserver(self,
                           selector: #selector(appLaunched(_:)),
                           name: NSWorkspace.didLaunchApplicationNotification,
                           object: nil)

        center.addObserver(self,
                           selector: #selector(appTerminated(_:)),
                           name: NSWorkspace.didTerminateApplicationNotification,
                           object: nil)

        center.addObserver(self,
                           selector: #selector(appActivated(_:)),
                           name: NSWorkspace.didActivateApplicationNotification,
                           object: nil)
    }

    @objc func appLaunched(_ notification: Notification) {
        if let app = notification.userInfo?[NSWorkspace.applicationUserInfoKey] as? NSRunningApplication {
            print("已启动:\(app.localizedName ?? "未知")")
        }
    }

    @objc func appTerminated(_ notification: Notification) {
        if let app = notification.userInfo?[NSWorkspace.applicationUserInfoKey] as? NSRunningApplication {
            print("已退出:\(app.localizedName ?? "未知")")
        }
    }

    @objc func appActivated(_ notification: Notification) {
        if let app = notification.userInfo?[NSWorkspace.applicationUserInfoKey] as? NSRunningApplication {
            print("已激活:\(app.localizedName ?? "未知")")
        }
    }
}
注意:
使用 NSWorkspace.shared.notificationCenter,不是 NotificationCenter.default!
需要保持 AppObserver 实例不被释放,否则监听就失效了。
4、启动文件编辑:openFile(_:withApplication:),指定 App 打开文件。
import AppKit

let filePath = "/Users/fangjunyu.com/Documents//存钱猪猪/piglet.xcodeproj"
let appPath = "/Applications/Xcode.app"  // 要用哪个 App 打开

let fileURL = URL(fileURLWithPath: filePath)
let appURL = URL(fileURLWithPath: appPath)

let config = NSWorkspace.OpenConfiguration()
NSWorkspace.shared.open([fileURL], withApplicationAt: appURL, configuration: config) { app, error in
    if let error = error {
        print("打开失败:\(error.localizedDescription)")
    } else {
        print("已成功使用 \(app?.localizedName ?? "Xcode") 打开项目")
    }
}
注意:这个写法是macOS 12+的异步版本,macOS11或以下用do-try-catch。
// fallback for older macOS
do {
    try NSWorkspace.shared.open([fileURL], withApplicationAt: appURL)
} catch {
    print("打开失败:\(error.localizedDescription)")
}
5、激活 App:openApplication(at:configuration:completionHandler:),启动或激活某 App 或 Finder。
import AppKit

if let appURL = NSWorkspace.shared.urlForApplication(withBundleIdentifier: "com.apple.Safari") {
    let config = NSWorkspace.OpenConfiguration()
    NSWorkspace.shared.openApplication(at: appURL, configuration: config) { app, error in
        if let error = error {
            print("启动失败:\(error.localizedDescription)")
        } else {
            print("成功启动:\(app?.localizedName ?? "未知 App")")
        }
    }
} else {
    print("无法找到 Safari 应用")
}
可以通过Terminal命令查看Bundle ID:
mdls -name kMDItemCFBundleIdentifier /Applications/Safari.app二、文件与Finder交互
1、打开文件/URL:open(_:withApplicationAt:configuration:),打开文件或 URL,可指定 App。
import AppKit

let url = URL(string: "https://apple.com")!
NSWorkspace.shared.open(url)    // 打开链接

let appURL = URL(fileURLWithPath: "/Applications/Notes.app")
NSWorkspace.shared.open(appURL) // 打开应用
2、显示文件在 Finder 中:activateFileViewerSelecting(_:),类似右键“在 Finder 中显示”。
import AppKit

let downloads = FileManager.default.urls(for: .downloadsDirectory, in: .userDomainMask).first!
let fileURL = downloads.appendingPathComponent("a.txt")
NSWorkspace.shared.activateFileViewerSelecting([fileURL])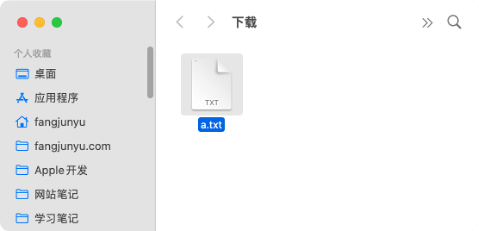
3、获取文件图标:icon(forFile:) / icon(forFileType:),获取某个文件或文件类型的图标。
import AppKit

let path = "/Users/you/Desktop/demo.txt"
let icon = NSWorkspace.shared.icon(forFile: path)
可以将这个 NSImage 用在 UI 上,例如:
@State private var icon: NSImage?

if let nsicon = icon {
    Image(nsImage: nsicon)
}4、获取文件类型描述:localizedDescription(forType:),获取文件类型的本地化描述。
import AppKit
import UniformTypeIdentifiers

if let type = UTType(filenameExtension: "xlsx"),
   let description = type.localizedDescription {
    print("描述:\(description)") // 如 “Office Open XML电子表格”
} else {
    print("无法识别文件类型")
}
5、设置 Dock 图标:setIcon(_:forFile:options:),修改文件或文件夹的图标。
import AppKit

let targetPath = "/Applications/ImageSlim.app"
let iconImage = NSImage(named: NSImage.folderName)!

NSWorkspace.shared.setIcon(nil, forFile: targetPath, options: [])
setIcon(nil, forFile:) 只能移除 Finder 设置的自定义图标,不能修改应用本身 Info.plist 内定义的图标(如 .icns)。
此外,此方法未能实际测试实现文件或文件夹图标的修改,因此仅在此举例,后续实际应用时,再补充该方法的实际应用。
三、桌面与显示器相关功能
1、获取当前显示器/桌面空间信息:NSWorkspace.shared.desktopImageURL(for:),获取当前桌面背景图路径。
import AppKit

if let screen = NSScreen.main {
    if let url = NSWorkspace.shared.desktopImageURL(for: screen) {
        print("当前主屏幕桌面背景路径:\(url.path)")    // 当前主屏幕桌面背景路径:/Users/Wallpaper/wallhaven-yx53zg.jpeg
    }
}
补充说明:
desktopImageURL(for:) 需要一个 NSScreen 参数;
如果想获取所有显示器的背景,可遍历 NSScreen.screens。
2、设置桌面背景图:setDesktopImageURL(_:for:options:),更改当前桌面壁纸。
import AppKit

if let screen = NSScreen.main {
    let imageURL = URL(fileURLWithPath: "/Users/you/Pictures/new-wallpaper.jpg")

    do {
        try NSWorkspace.shared.setDesktopImageURL(imageURL, for: screen, options: [:])
        print("设置桌面背景成功")
    } catch {
        print("设置失败:\(error.localizedDescription)")
    }
}
权限提示:
macOS 可能需要开启“系统设置 → 隐私与安全性 → 完整磁盘访问”才能生效。
某些第三方桌面管理器(如 Display Spaces)也可能影响设置效果。
3、获取所有屏幕:通过 NSScreen.screens 搭配使用,多显示器处理。
import AppKit

for screen in NSScreen.screens {
    print("屏幕尺寸:\(screen.frame)")

    if let bgURL = NSWorkspace.shared.desktopImageURL(for: screen) {
        print("该屏幕背景图:\(bgURL.path)")
    }
}
四、电源状态与系统事件监听
1、监听系统休眠、唤醒:NSWorkspace.willSleepNotification / didWakeNotification,用于节能处理或数据保存。
let center = NSWorkspace.shared.notificationCenter

center.addObserver(forName: NSWorkspace.willSleepNotification, object: nil, queue: .main) { _ in
    print("系统即将休眠,保存数据或准备进入节能模式")
}

center.addObserver(forName: NSWorkspace.didWakeNotification, object: nil, queue: .main) { _ in
    print("系统已唤醒,可恢复任务")
}2、监听用户登录/注销:sessionDidBecomeActiveNotification 等,检测用户登录、注销、切换用户等。
let center = NSWorkspace.shared.notificationCenter

center.addObserver(forName: NSWorkspace.sessionDidBecomeActiveNotification, object: nil, queue: .main) { _ in
    print("用户登录或切换回本用户")
}

center.addObserver(forName: NSWorkspace.sessionDidResignActiveNotification, object: nil, queue: .main) { _ in
    print("用户切换走了或注销了")
}3、监听屏幕锁定/解锁:screensDidLockNotification / screensDidUnlockNotification,判断用户离开与回来。
let distCenter = DistributedNotificationCenter.default()

distCenter.addObserver(forName: NSNotification.Name("com.apple.screenIsLocked"), object: nil, queue: .main) { _ in
    print("屏幕已锁定")
}

distCenter.addObserver(forName: NSNotification.Name("com.apple.screenIsUnlocked"), object: nil, queue: .main) { _ in
    print("屏幕已解锁")
}4、监听音量挂载/移除:didMountNotification / didUnmountNotification,检测 U 盘、移动硬盘接入/移除。
let center = NSWorkspace.shared.notificationCenter

center.addObserver(forName: NSWorkspace.didMountNotification, object: nil, queue: .main) { notification in
    if let path = notification.userInfo?[NSWorkspace.volumeURLUserInfoKey] as? URL {
        print("设备已挂载:\(path.path)")
    }
}

center.addObserver(forName: NSWorkspace.didUnmountNotification, object: nil, queue: .main) { notification in
    if let path = notification.userInfo?[NSWorkspace.volumeURLUserInfoKey] as? URL {
        print("设备已移除:\(path.path)")
    }
}
五、URL Scheme 与系统服务
1、打开网页等 URL:open(_:options:configuration:),打开 web 链接、mailto 等。
if let url = URL(string: "mailto:someone@example.com?subject=你好&body=这是一封来自App的邮件") {
    let config = NSWorkspace.OpenConfiguration()
    NSWorkspace.shared.open(url, configuration: config) { app, error in
        if let error = error {
            print("打开失败:\(error.localizedDescription)")
        } else {
            print("成功调用邮件客户端:\(app?.localizedName ?? "未知应用")")
        }
    }
}
2、检查 URL 是否可打开:urlForApplication(toOpen:),判断是否能用某 App 打开某 URL。
if let url = URL(string: "mailto:someone@example.com") {
    if let appURL = NSWorkspace.shared.urlForApplication(toOpen: url) {
        print("可以用 \(appURL.path) 打开")
    } else {
        print("没有可打开该链接的 App")
    }
}
3、注册/管理 URL Scheme(间接):通过 Info.plist 注册 + NSWorkspace 调用,常用于自定义 URL scheme 启动 App。
macOS 支持 App 通过注册自定义的 URL scheme(如 myapp://)被系统调用。
深层链接可能复杂一些,这里不做过多的介绍,有需求会单独做一篇macOS的文章,如果想要了解深层链接,可以查看iOS的《SwiftUi配置深层链接》。
六、辅助功能与可访问性
辅助功能权限检测:不是 NSWorkspace 直接提供,但常搭配使用,检查 App 是否有辅助功能权限,以访问 UI 元素。
判断App是否已开启辅助功能权限:
import ApplicationServices

let isTrusted = AXIsProcessTrusted()
print("辅助功能权限:\(isTrusted ? "已授权" : "未授权")")
配合NSWorkspace打开设置界面:
import AppKit

if !AXIsProcessTrusted() {
    let url = URL(string: "x-apple.systempreferences:com.apple.preference.security?Privacy_Accessibility")!
    NSWorkspace.shared.open(url)
}
这会直接打开:系统设置 > 隐私与安全性 > 辅助功能
用户可手动勾选 App。
注意事项
在打开指定App的时候,我们使用 URL(fileURLWithPath:””) 创建URL路径,然后通过 NSWorkspace.shared.open 命令直接打开:
let appURL = URL(fileURLWithPath: "/Applications/Notes.app")
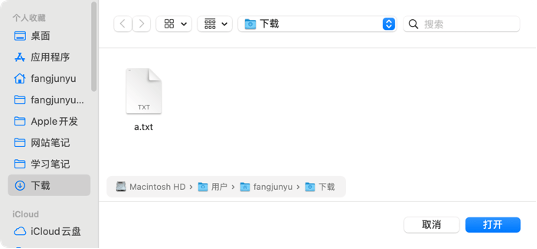
NSWorkspace.shared.open(appURL)但是,我们无法使用这个方法打开Downloads路径下的文件:
let appURL = URL(fileURLWithPath: "/Downloads/小说.txt")  // ❌ 无法打开 Downloads 目录中的文件
NSWorkspace.shared.open(appURL)
这是因为路径不正确或权限不足导致的报错。
正确做法:使用NSOpenPanel请求访问
让用户自己选中文件或目录,就能避免权限限制。系统会弹窗授权。
import AppKit

func selectFileOrFolder() {
    let panel = NSOpenPanel()
    panel.canChooseDirectories = true
    panel.canChooseFiles = true
    panel.allowsMultipleSelection = false
    panel.directoryURL = FileManager.default.urls(for: .downloadsDirectory, in: .userDomainMask).first  // 指定 Downloads 文件夹

    if panel.runModal() == .OK, let selectedURL = panel.url {
        print("用户选择:\(selectedURL)")
        NSWorkspace.shared.open(selectedURL) // 或者读取文件内容
    }
}
在SwiftUI中调用该方法:
Button("选择文件") {
    selectFileOrFolder()
}
/Applications和~/Downloads目录的区别
此外,/Applications:系统级路径,所有App都可访问,不在沙盒保护下。
~/Downloads:属于用户个人路径,非系统公开路径,受到沙盒保护。
所以,可以直接使用/Applications的路径:
URL(fileURLWithPath: "/Applications/WeChat.app")而~/Downloads属于用户下载路径,不同用户的目录路径不同,通常处在App沙盒保护中。
因此,如果希望获取“Downloads”等用户个人目录,就需要通过FileManager获取 “当前登录用户” 的下载目录:
let downloads = FileManager.default.urls(for: .downloadsDirectory, in: .userDomainMask).first!这个方法会返回当前用户的路径,例如:
file:///Users/fangjunyu/Downloads/此外,FileManager还需要配合App Sandbox系统机制,允许用于授权访问权限。
总结
NSWordspace可以实现:
1、打开网址、文件、文件夹和App等资源。
2、获取当前活跃App、运行中的App列表。
3、与系统的Finder进行交互、显示文件、激活App。
4、监听系统事件,实现App的启动/退出、屏幕睡眠和音量变化等。
相关文章
1、macOS管理App Sandbox权限:https://fangjunyu.com/2025/06/20/macos%e7%ae%a1%e7%90%86app-sandbox%e6%9d%83%e9%99%90/
2、SwiftUi配置深层链接:https://fangjunyu.com/2025/02/08/swiftui%e9%85%8d%e7%bd%ae%e6%b7%b1%e5%b1%82%e9%93%be%e6%8e%a5/
3、macOS获取当前运行应用NSRunningApplication:https://fangjunyu.com/2025/07/25/macos%e8%8e%b7%e5%8f%96%e5%bd%93%e5%89%8d%e8%bf%90%e8%a1%8c%e5%ba%94%e7%94%a8nsrunningapplication/