
问题复现
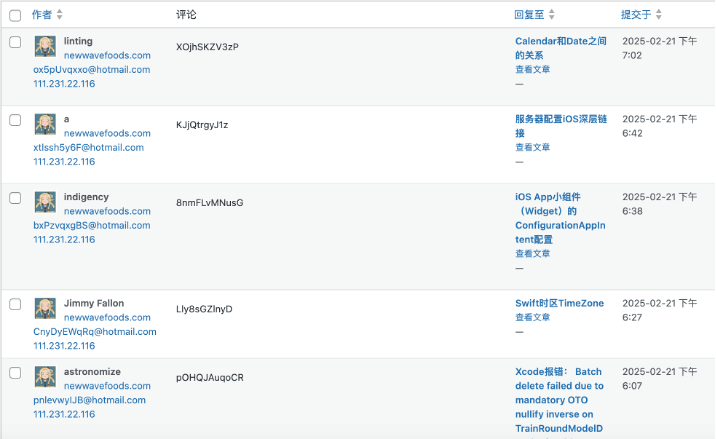
最近WordPress一直有些奇怪的留言,因此考虑封禁这个恶意IP。
首先,我通过Nginx日志查看留言ip。
在服务器上,查找Nginx日志路径:/var/log/nginx/access.log
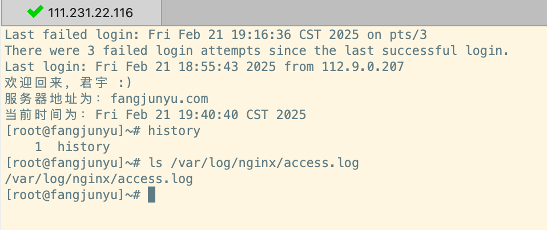
因为服务器端不好操作,因此我通过scp命令将access.log文件下载到本地。
scp root@111.231.22.116:/var/log/nginx/access.log .
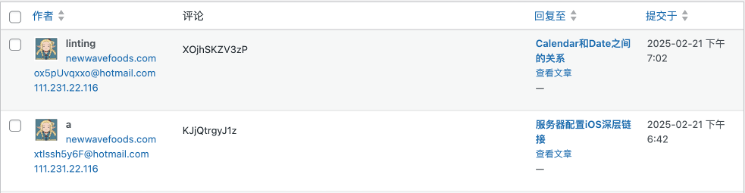
接着查找恶意IP在WordPress留言的文章,例如《Calendar和Date之间的关系》和《服务器配置iOS深层链接》。
在评论中,找到“查看文章”按钮,右击复制链接地址
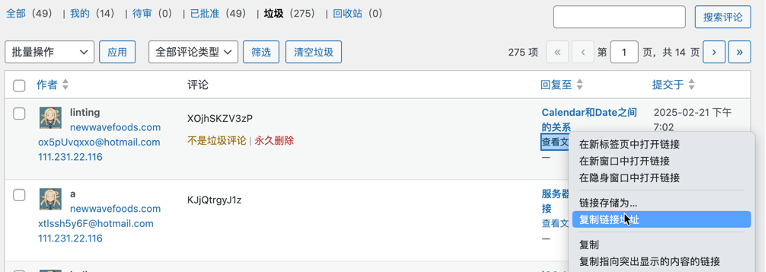
这个链接地址复制到浏览器或者在文本应用中打开,显示如下内容。

因为access.log中不会显示域名,因此查找地址内容:
2025/02/12/calendar%e5%92%8cdate%e4%b9%8b%e9%97%b4%e7%9a%84%e5%85%b3%e7%b3%bb将 access.log 文件通过文本编辑应用打开后,查找地址内容:
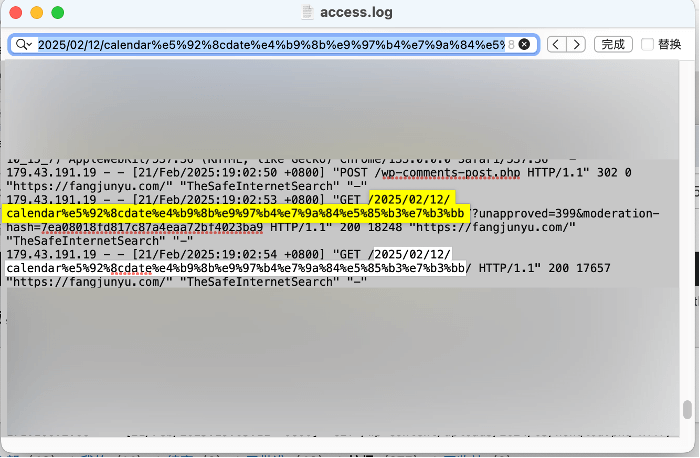
经过查询发现,19点02分有一个ip(179.43.191.19)访问这个文章。在access中只有8处含有这个文章地址,在19点左右只有这一个ip访问这个文章。
同理,查找另一个文章的地址部分:
2025/02/16/ios-app%e5%b0%8f%e7%bb%84%e4%bb%b6%ef%bc%88widget%ef%bc%89%e7%9a%84configurationappintent%e9%85%8d%e7%bd%ae也是这个ip(179.43.191.19)访问这一文章。
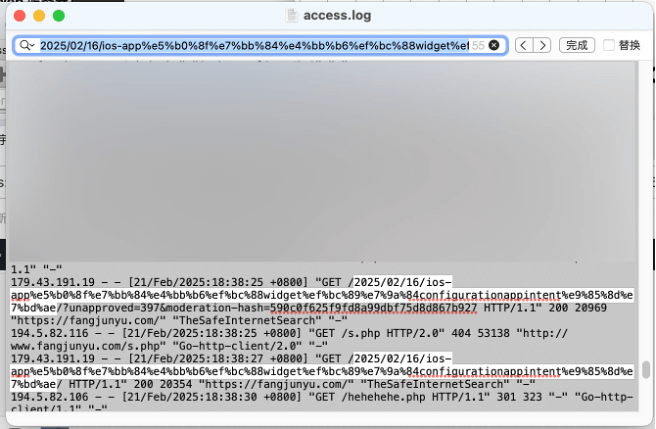
因此,通过对比可以了解到,恶意ip为179.43.191.19。
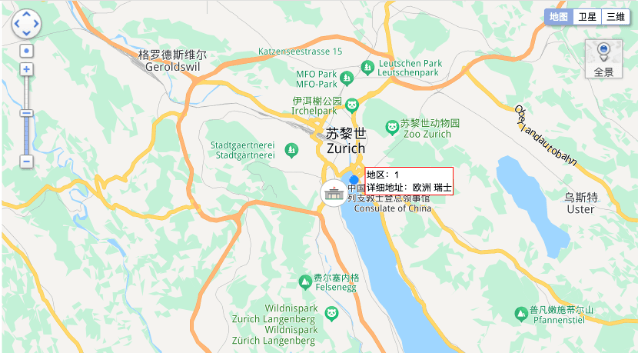
接着,我通过ip查询,发现这个恶意ip在瑞士。
封禁恶意IP
在服务器端,则需要利用iptables防火墙封禁这个恶意IP。
执行如下命令:
iptables -A INPUT -s 179.43.191.19 -j DROP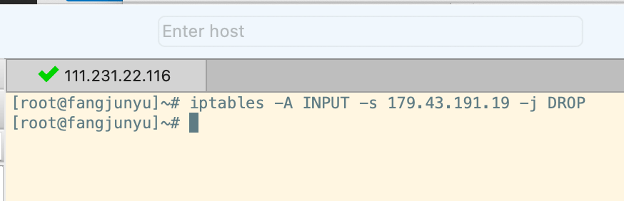
可以通过iptables -L查看规则是否生效:
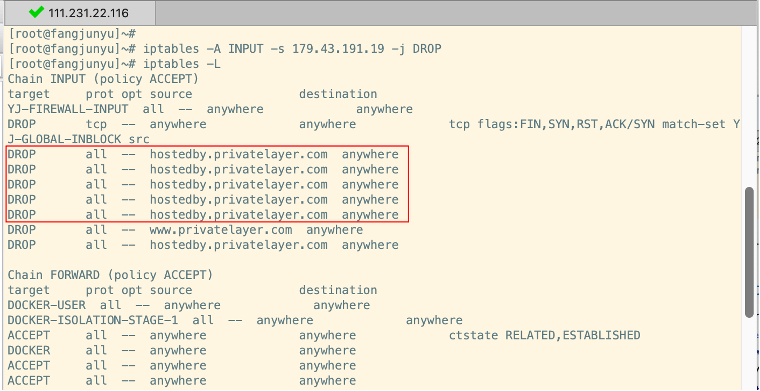
可以看到,这里显示的内容为:
~# iptables -L
Chain INPUT (policy ACCEPT)
target     prot opt source               destination
YJ-FIREWALL-INPUT  all  --  anywhere             anywhere
DROP       tcp  --  anywhere             anywhere             tcp flags:FIN,SYN,RST,ACK/SYN match-set YJ-GLOBAL-INBLOCK src
DROP all -- hostedby.privatelayer.com anywhere 这里可能会产生一个疑问,那就是明明封禁的是179.43.191.19这个恶意IP,但封禁名单里显示的是hostedby.privatelayer.com,以至于我在封禁时以为iptables功能出现了问题。
我以为179.43.191.19这个恶意IP指向的是hostedby.privatelayer.com这个域名,当我在本地电脑进行ping时发现,hostedby.privatelayer.com指向的是81.17.29.217。
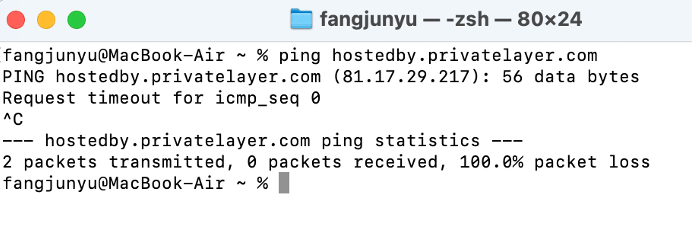
到这里整个关系为,封禁恶意IP后,实际封禁的是一个域名,而域名指向另一个IP。

经过查询了解到,179.43.191.19 可能通过某个代理或 CDN 服务(如 privatelayer.com)进行访问。这种情况并不罕见,尤其是在网络流量通过第三方服务(例如,内容分发网络、代理、负载均衡器等)转发时,可能会看到与实际源 IP 地址不同的 IP 地址。
具体解释为:
hostedby.privatelayer.com 是一个主机名,通常指的是服务提供商的域名或网络入口点,它可能是代理、服务器提供商或 CDN 的一部分。
ping hostedby.privatelayer.com 返回的 81.17.29.249 是该域名所对应的实际 IP 地址。
179.43.191.19 是该访问者的原始 IP 地址,但它通过 hostedby.privatelayer.com 代理服务访问的服务器,如果恶意用户通过代理或 VPN 连接,该 IP 地址可能只是一个中继节点。

注意:这张图的逻辑结构存疑,恶意IP也可能由服务提供商提供,而不是代理。
为什么会出现这种情况?
1、CDN 或代理服务:如果该 IP 地址是通过 CDN 或代理服务器访问的,那么封禁的 IP 地址 179.43.191.19 可能并不是直接访问网站的客户端 IP,而是一个中介的服务器。
2、负载均衡:某些负载均衡器或反向代理服务器可能会通过不同的 IP 地址访问服务器,但仍然转发用户的原始请求。
因此,在iptables中显示的封禁IP为:hostedby.privatelayer.com,封禁的本质是阻止来自 179.43.191.19 这个恶意 IP 的流量。
最后如果想要解封恶意IP,认为存在误封的情况,可以执行:
iptables -D INPUT -s 179.43.191.19 -j DROP扩展知识
管理iptables防火墙
1、启动 iptables 服务
如果使用的是 systemd 管理的系统(例如 CentOS 7+、Ubuntu 16.04+ 等),你可以通过以下命令启用 iptables:
sudo systemctl start iptables2、设置开机启动 iptables 服务
如果希望 iptables 在系统启动时自动启用,可以运行以下命令:
sudo systemctl enable iptables3、查看 iptables 状态
启动后,可以通过以下命令来检查 iptables 防火墙的状态:
sudo systemctl status iptables4、重启 iptables 服务
如果修改了 iptables 配置并希望重新加载规则,可以使用以下命令重启 iptables 服务:
sudo systemctl restart iptables5、停止 iptables 服务
如果希望暂时禁用 iptables 防火墙,可以运行以下命令来停止它:
sudo systemctl stop iptables6、禁止 iptables 开机启动
如果不希望 iptables 在系统启动时自动启用,可以禁用它:
sudo systemctl disable iptables7、检查 iptables 状态
停止后,可以查看 iptables 是否已停止:
sudo systemctl status iptables8、清除所有规则(可选)
如果希望清除现有的所有规则并恢复到默认的允许所有流量的状态,可以使用以下命令:
sudo iptables -F这将删除所有现有规则,但不会停止 iptables 服务。