内容简介
在SwiftUI 100天中,学习到 “使用 Create ML 训练模型”一文,因此想要做一篇中文的简单科普文,让学习Swift或iOS、macOS应用的朋友也了解这一训练模型。
Create ML 和 Core ML 简化了设备上的机器学习流程,让开发者可以轻松训练和使用自定义模型。在这个过程中,可以根据不同的数据类型和任务,创建和集成机器学习模型到 iOS、macOS 应用中。
训练过程
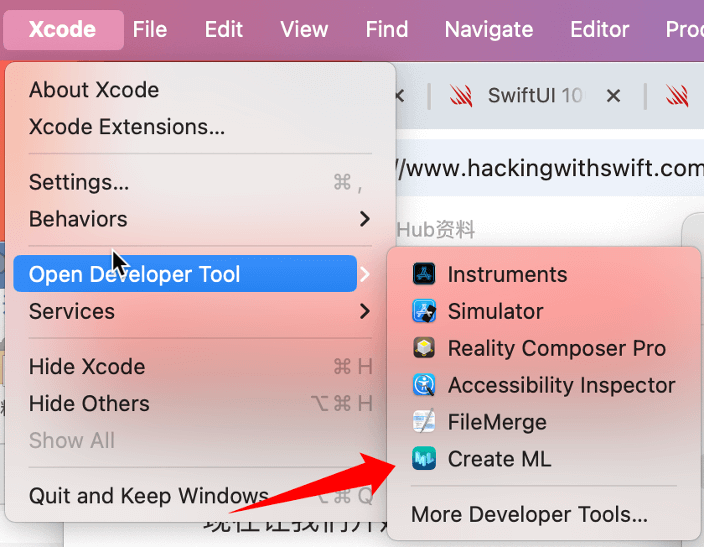
首先,我们打开Xcode并在菜单中选择“Open Developer Tool” -> “Create ML”。
Create ML会要求你创建一个或打开一个项目。
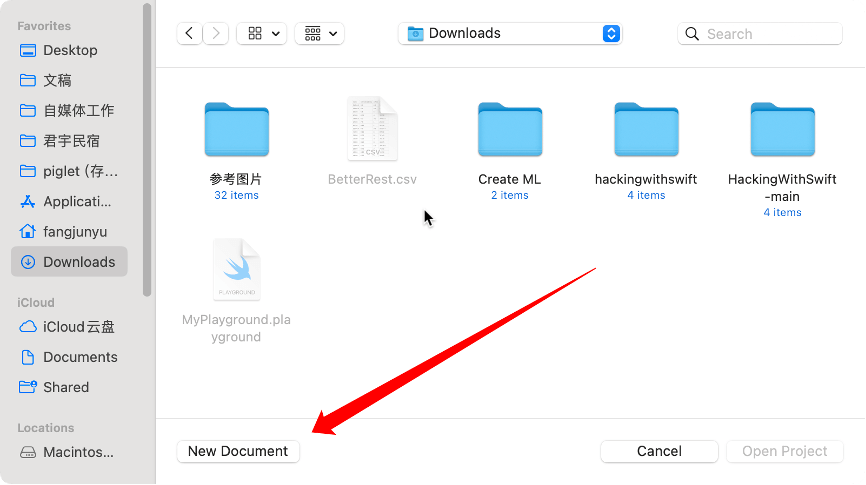
首次打开,我们在合适位置点击“New Document”,创建对应的模版。
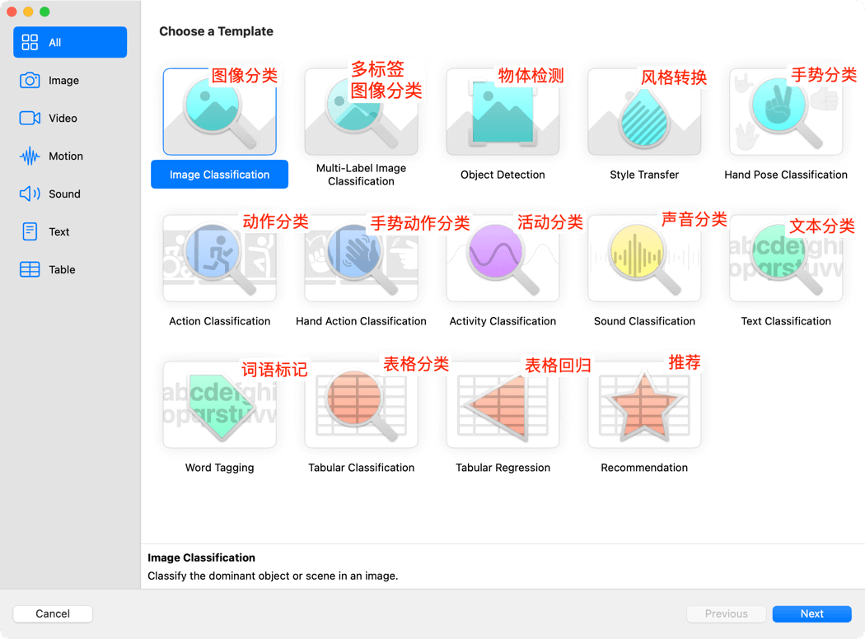
本次选择的是“Tabular Regression”(表格回归),点击“Next”按钮。
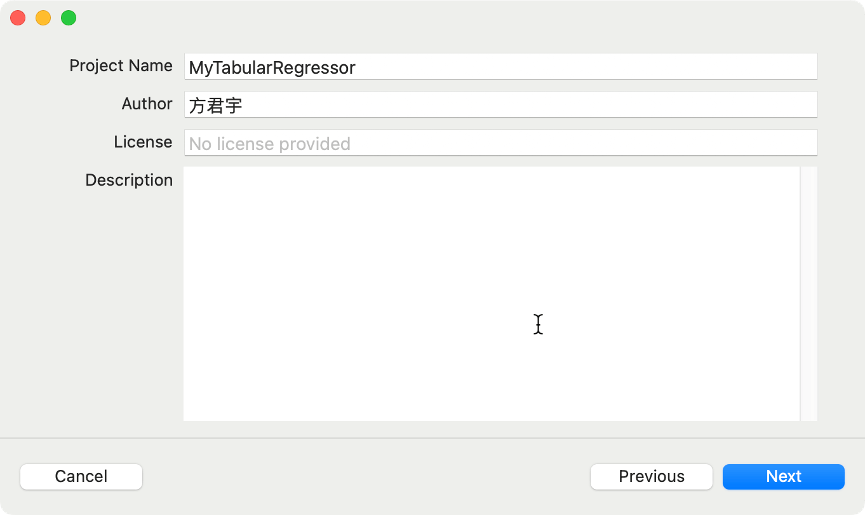
输入项目名称后,点击“Next”按钮,选择存储位置后,点击“Create”按钮。
全部完成后,打开Create ML界面。
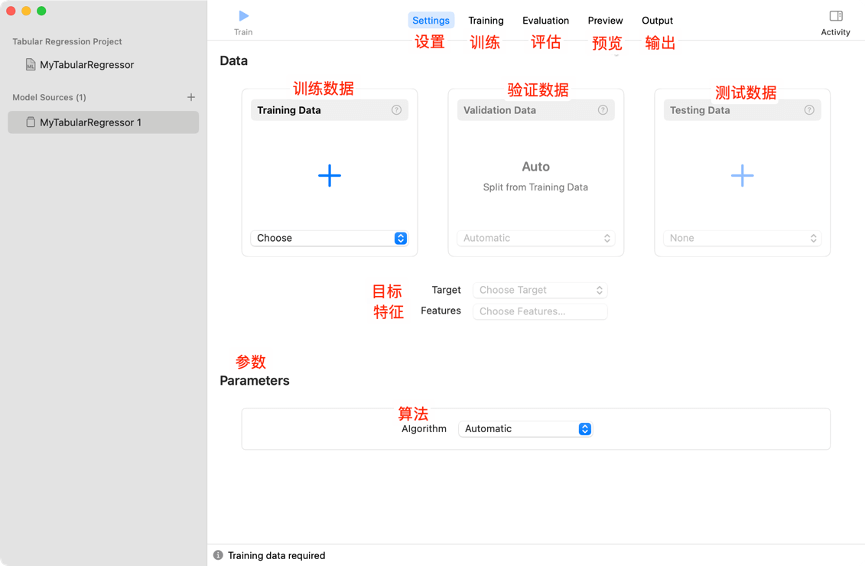
首先,我们给Create ML提供一些训练数据,我们在界面中点击“Training Data”(训练数据),选择下面的训练数据并打开。
训练数据下载地址:https://fangjunyu.com/wp-content/uploads/2024/09/BetterRest.csv
在训练数据中,如果我们选择某人认为自己需要多少睡眠以及他们实际上需要多少睡眠作为特征,我们就可以训练计算机预测他们喝了多少咖啡。
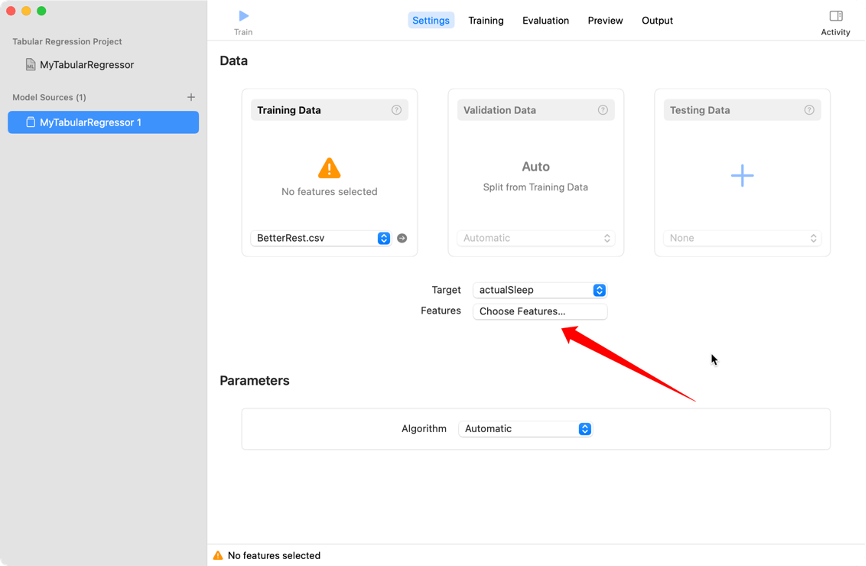
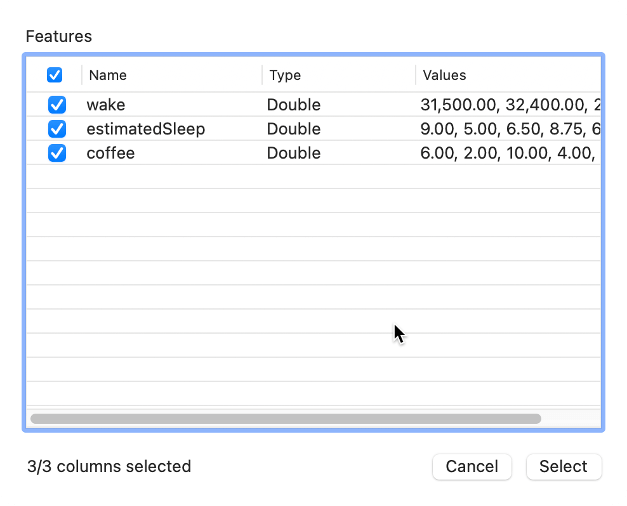
因此,我们选择“actualSleep”作为目标,在特性中选择所有的三个选项:”wake”、”estimatedSleep”和”coffee”。
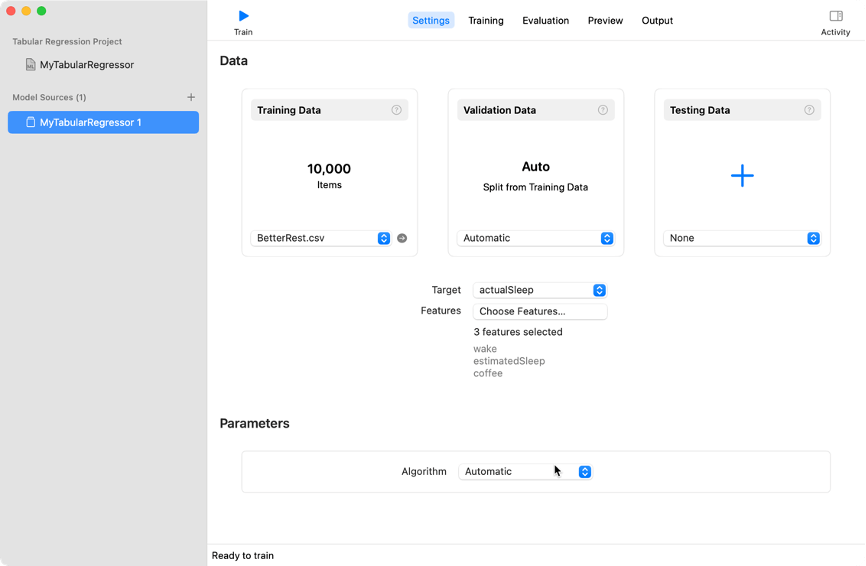
最后,我们在“Parameters”(参数)中找到“Algorithm”(算法),这里一共有五种算法,分别为:
- Automatic(自动)
- Random Forest(随机森林)
- Boosted Tree(增强树)
- Decision Tree(决策树)
- Linear Regression(线性回归)
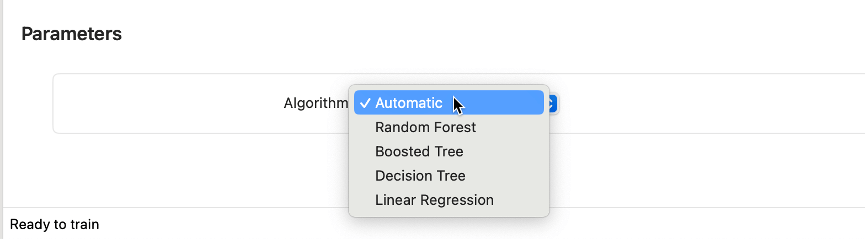
每种选择都采用不同的方法来分析数据,这里我们选择默认的“Automatic”(自动)算法,他会尝试自动选择最佳算法。
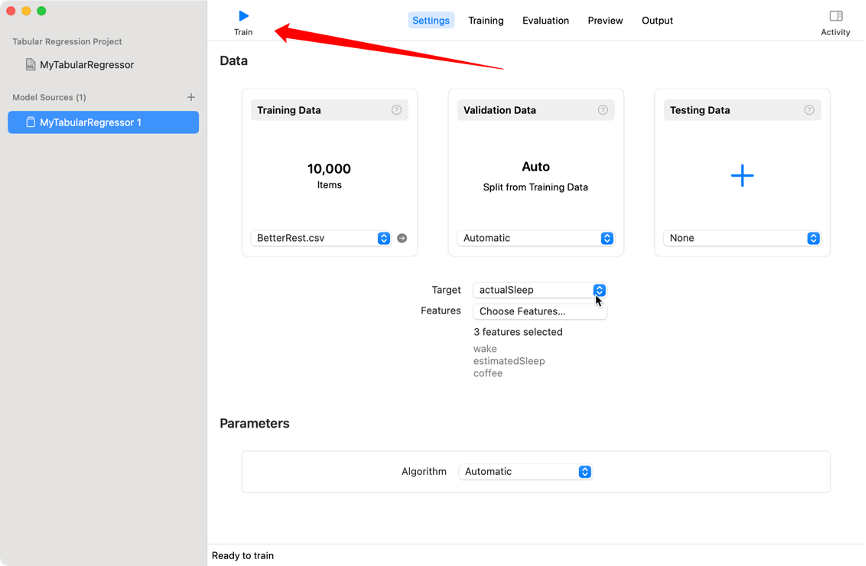
最后,我们点击左上角的“Train”(训练)按钮,几秒钟后就会完成本次训练。

提示训练完成后,我们切换到“Evaluation”(评估)界面。
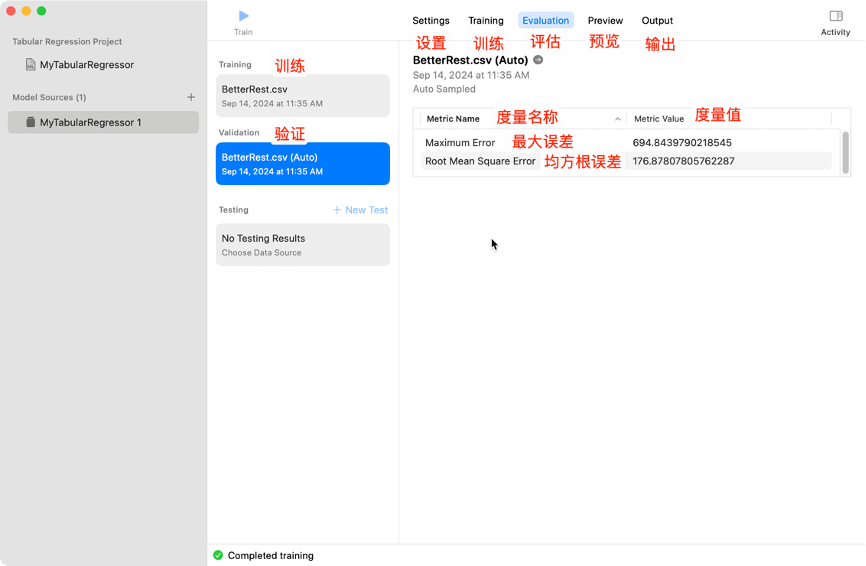
根据上方的数据,我们可以看到预测评估的准确睡眠时间误差为176秒。
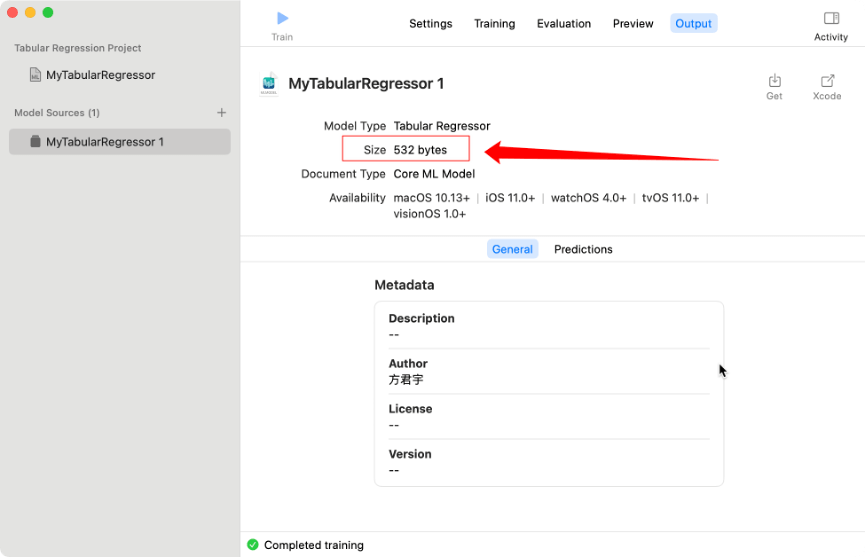
最后,我们切换到“Ouput”(输出)界面,在这里我们可以看到我们训练的模型大小为532字节。我们可以点击“Get”按钮将模型保存到桌面,以便后续使用。
导出的.mlmodel文件,最终的使用场景就是在Xcode项目中使用。
SleepCalculator.mlmodel下载地址:https://fangjunyu.com/wp-content/uploads/2024/09/SleepCalculator.mlmodel
使用步骤

首先,我们将生成的“SleepCalculator.mlmodel”模型文件拖动到Xcode中。
1、在View视图中,首先创建模型配置
let config = MLModelConfiguration()MLModelConfiguration 用于初始化 Core ML 模型配置。
let config = MLModelConfiguration():创建一个默认的模型配置对象。
2、加载创建的SleepCalculatorm模型
let model = try SleepCalculator(configuration: config)注意的是,这里的SleepCalculator需要跟导入的模型名称保持一致。否则就会报Cannot find ‘SleepCalculators’ in scope的报错,
3、使用模型进行预测,这里需要传入相关相关预测字段。
let prediction = try model.prediction(wake: Double(hour + minute), estimatedSleep: sleepAmount, coffee: Double(coffeeAmount))这里的字段跟模型训练时的字段为一一对应,缺少字段就会报:Missing argument for parameter ‘wake’ in call错误。
最后,我们就可以从prediction中获取到实际的睡眠时间:
prediction.actualSleep4、完整示例代码:
func calculateBedtime() {
    do {
        // 1. 创建模型配置
        let config = MLModelConfiguration()

        // 2. 加载SleepCalculator模型
        let model = try SleepCalculator(configuration: config)

        // 3. 获取用户输入的醒来时间并将其转换为秒
        let components = Calendar.current.dateComponents([.hour, .minute], from: wakeUp)
        let hour = (components.hour ?? 0) * 60 * 60
        let minute = (components.minute ?? 0) * 60

        // 4. 使用模型进行预测,传入醒来时间(以秒为单位)、睡眠时间和咖啡消耗量
        let prediction = try model.prediction(wake: Double(hour + minute), estimatedSleep: sleepAmount, coffee: Double(coffeeAmount))

        // 5. 根据模型预测结果计算就寝时间
        let sleepTime = wakeUp - prediction.actualSleep

        // 6. 将结果显示给用户
        alertTitle = "Your ideal bedtime is…"
        alertMessage = sleepTime.formatted(date: .omitted, time: .shortened)
        showingAlert = true
    } catch {
        // 如果发生错误,捕获异常并处理
        alertTitle = "Error"
        alertMessage = "Sorry, there was a problem calculating your bedtime."
        showingAlert = true
    }
}
参考资料
使用 Create ML 训练模型:https://www.hackingwithswift.com/books/ios-swiftui/training-a-model-with-create-ml